

Cal.com
Connect Cal.com so your AI agents can read event types, schedules, availability, calendars, and teams — and optionally coordinate bookings under permissions you set per agent.
What your agents can do with Cal.com
Read actions
Available with Read only or higher.
- Find organization IDs.
- List teams and team members.
- List event types.
- Check busy calendar periods.
- List connected calendars.
- Read the account profile.
- List team memberships and organization users.
Write actions
Available only with Read and write.
- Connect or check a calendar connection.
- Create or update a team profile.
- Reserve an available event slot.
Connecting and testing Cal.com step by step
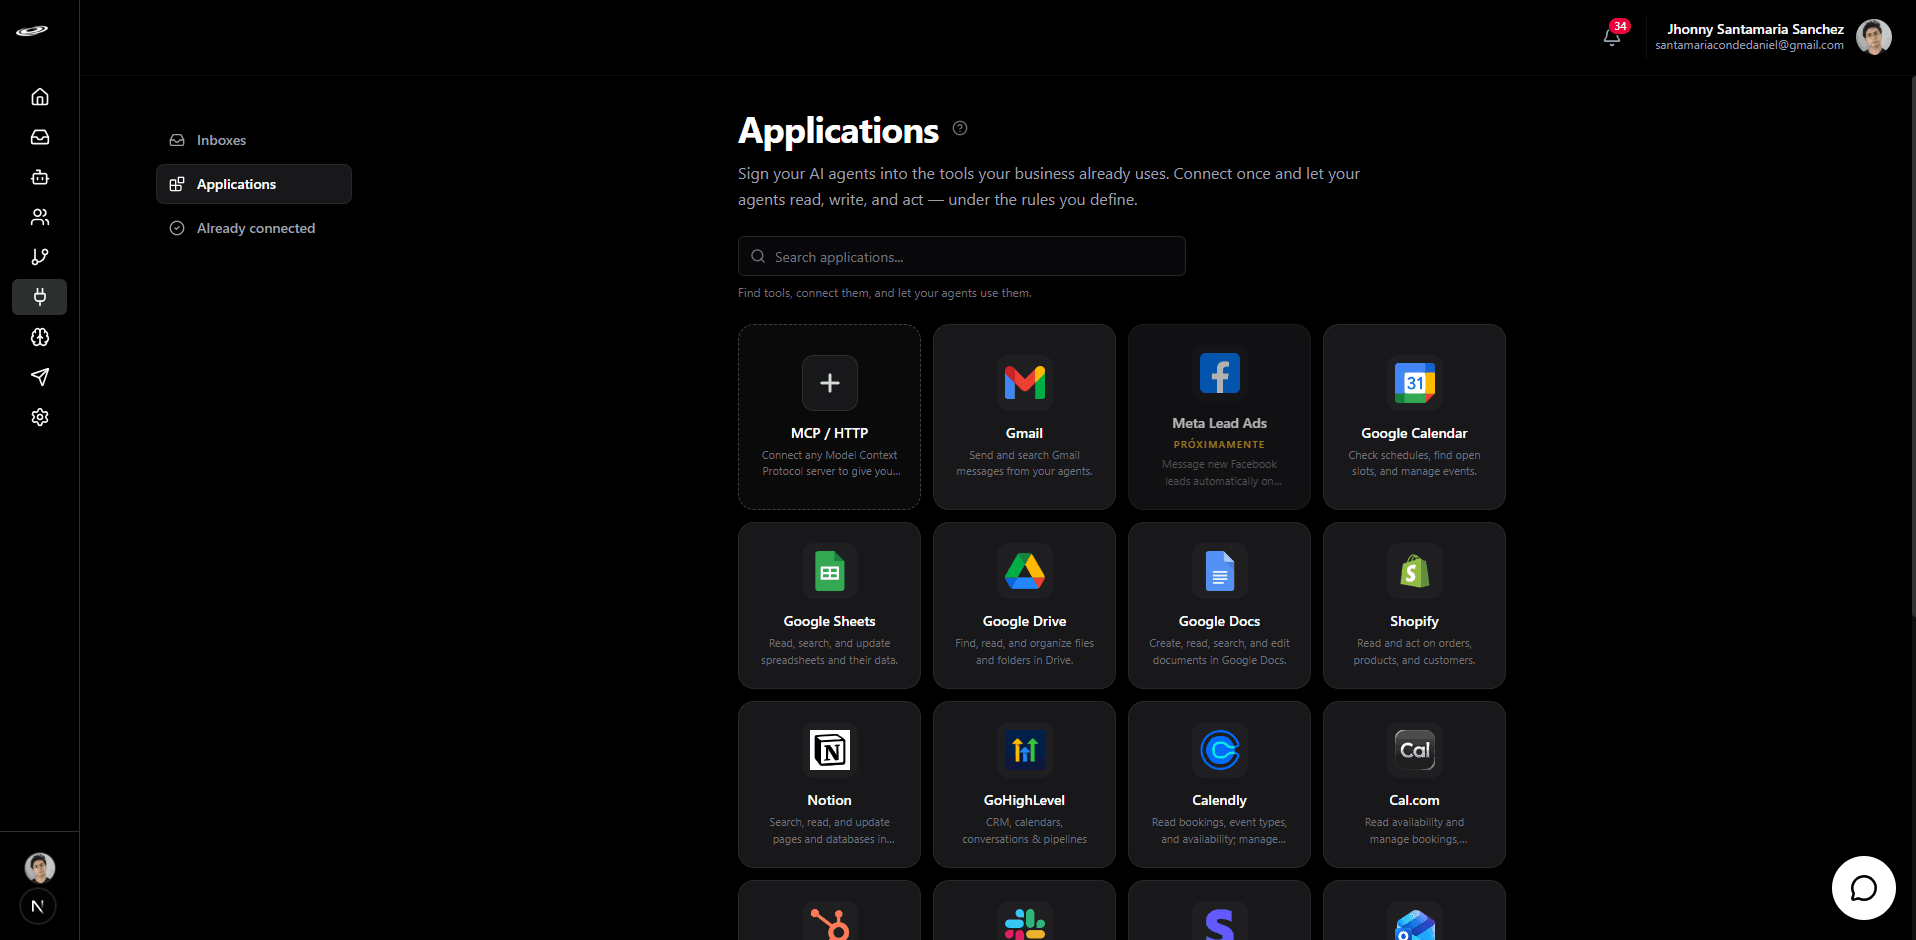
1Open Connect → Applications
From the sidebar, open Connect and select Applications. Find the Cal.com card in the list.
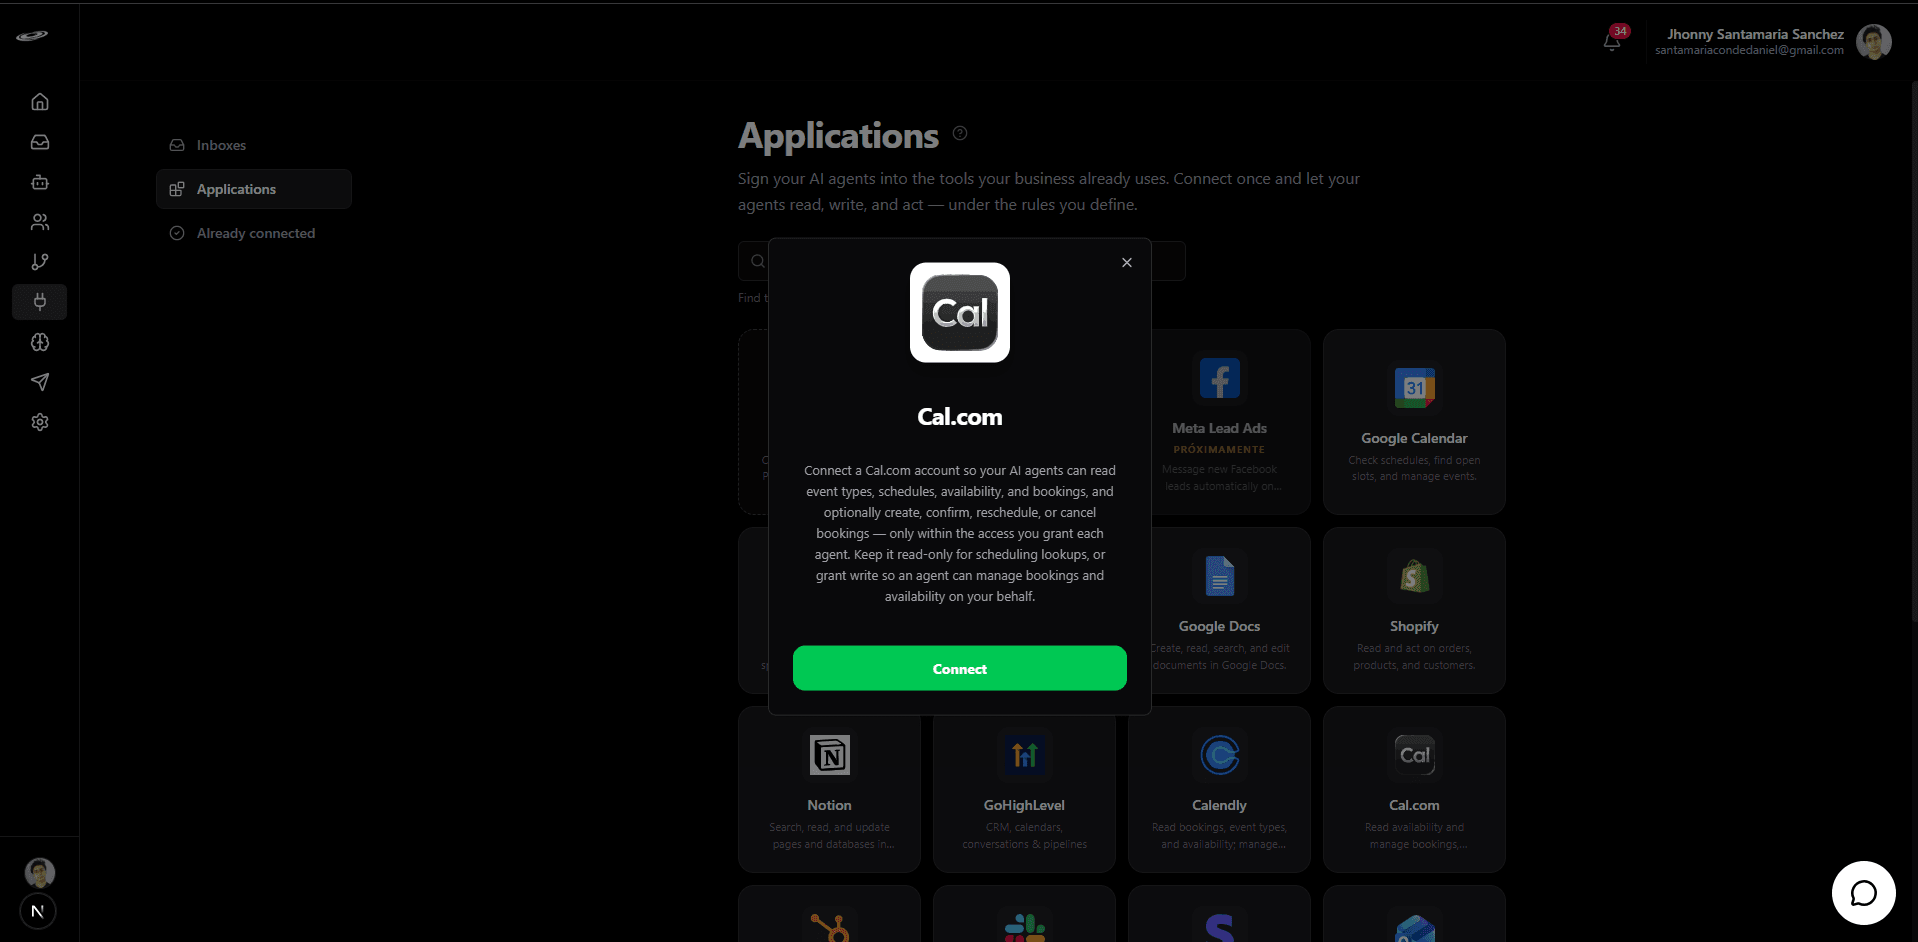
2Open the Cal.com card and click Connect
Open the card, review what the connection enables, and click the green Connect button.
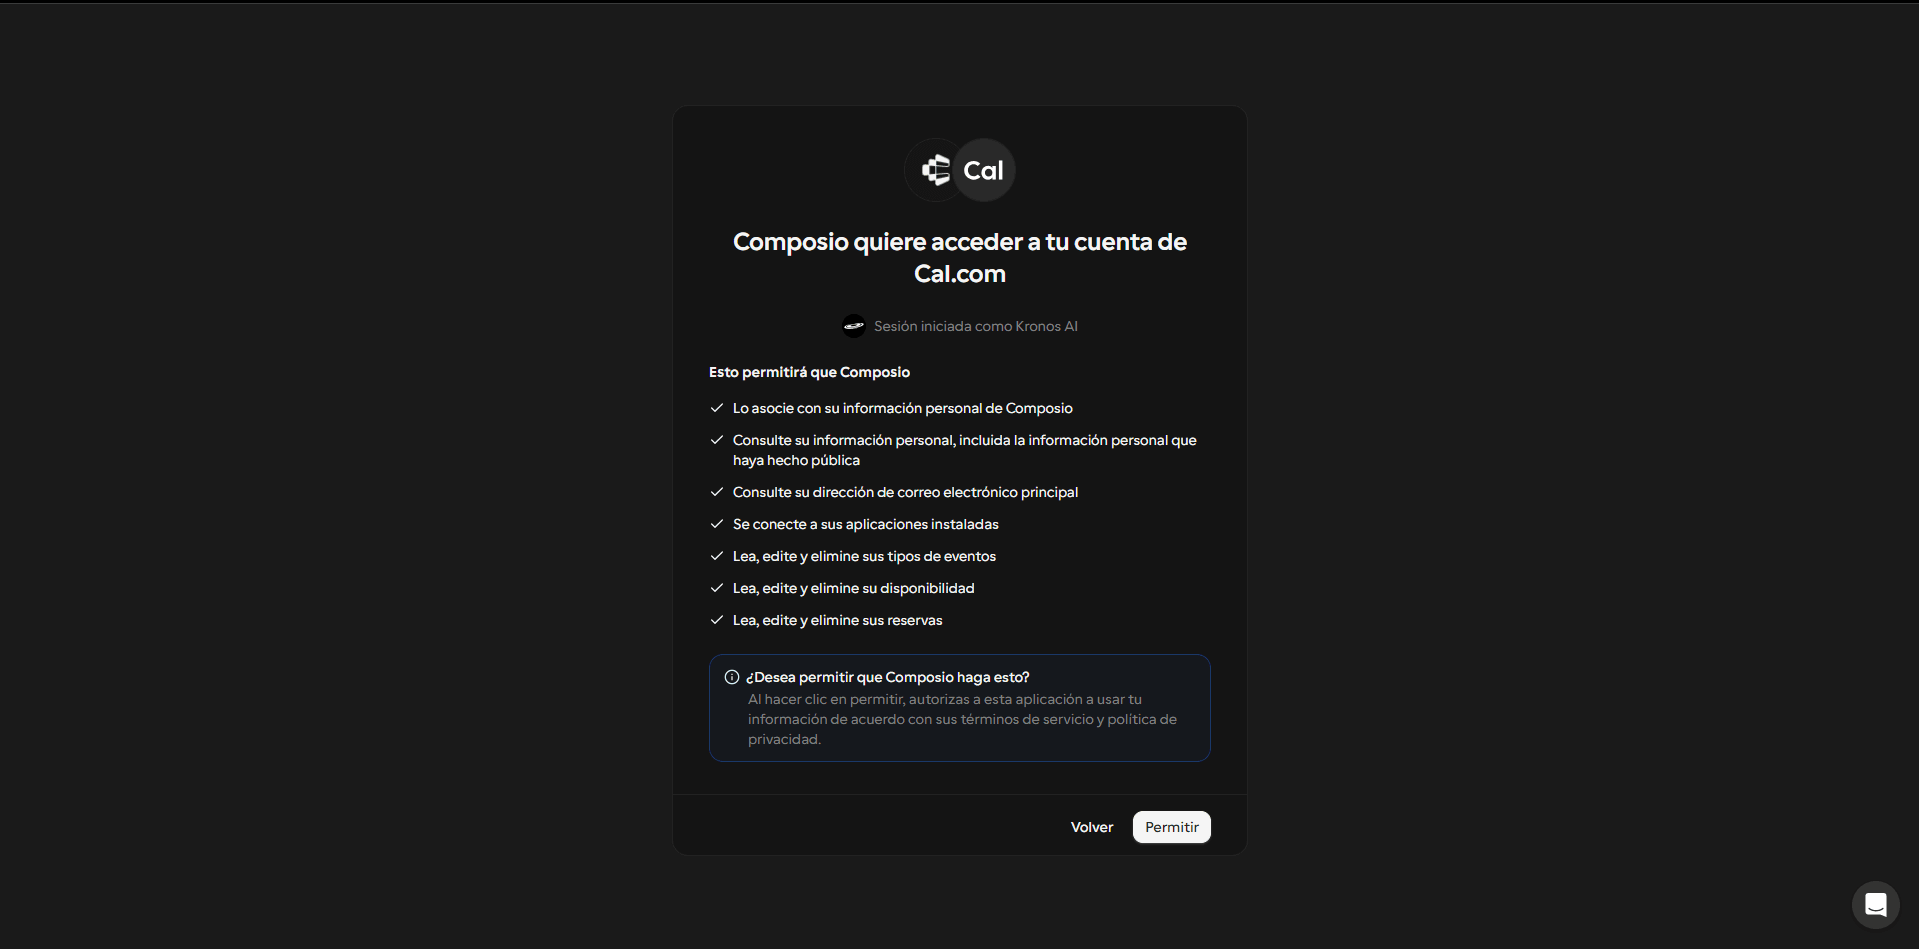
3Review and approve access
Review the Cal.com authorization screen and approve the requested access.
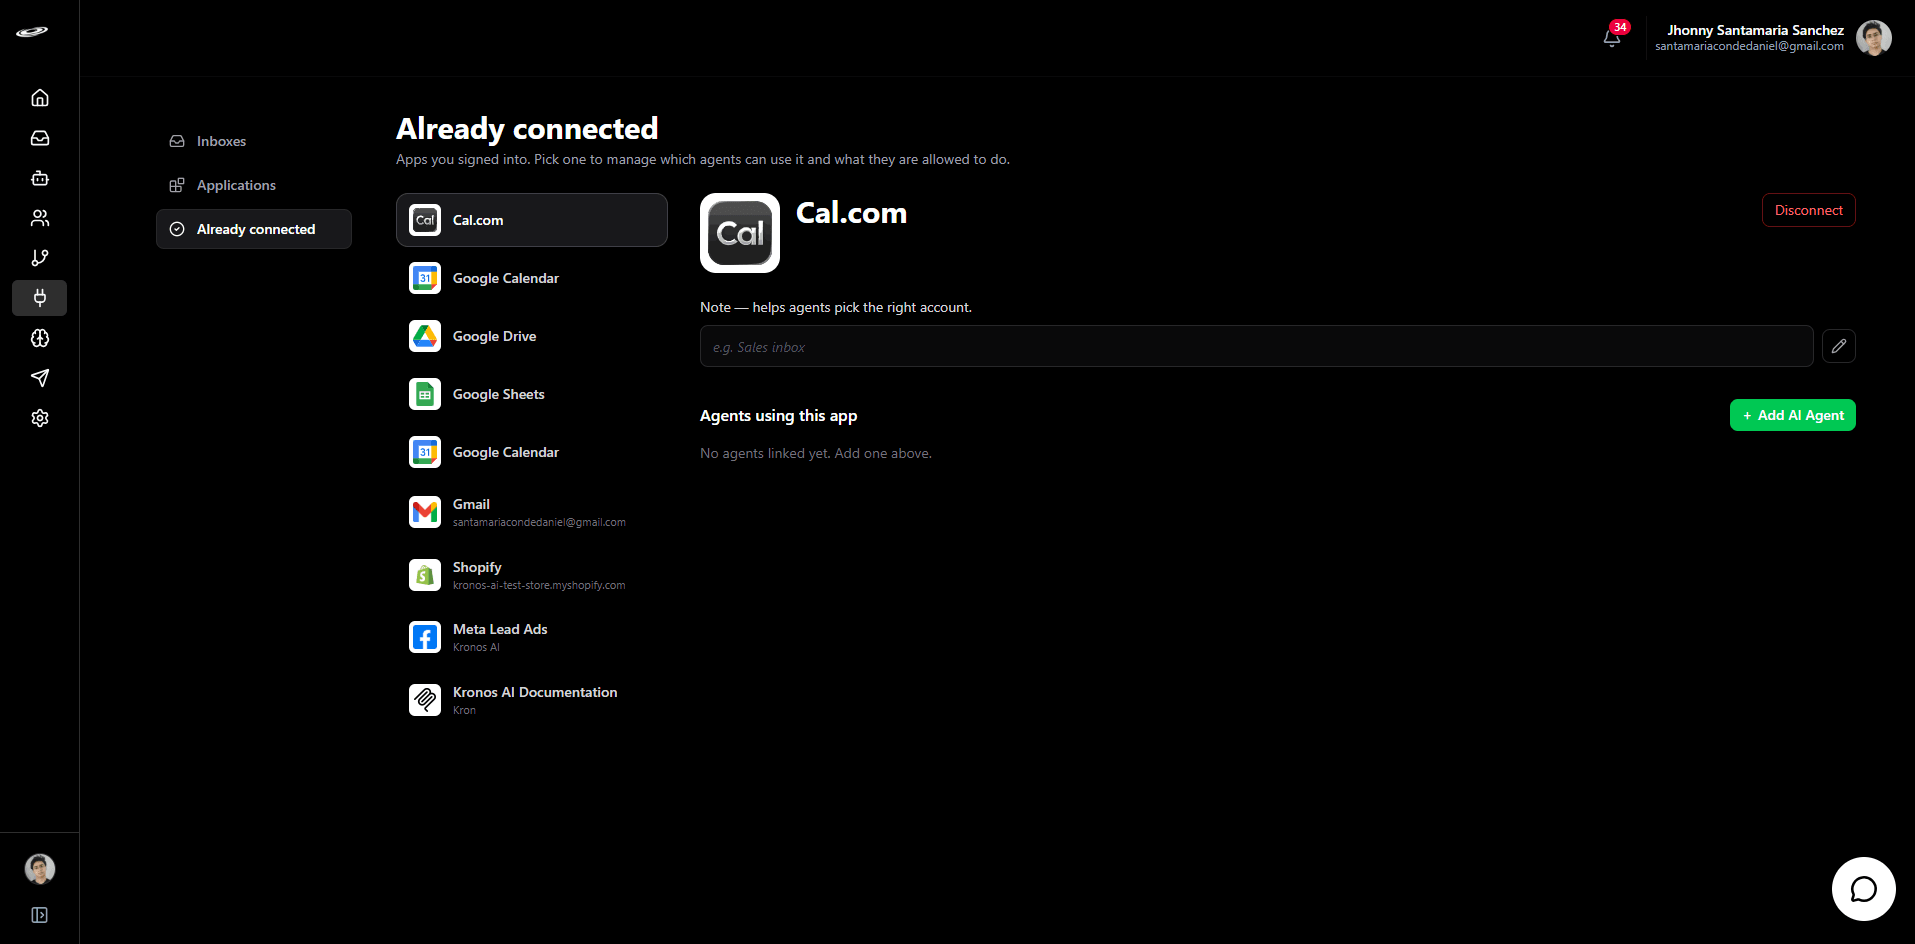
4Confirm the connection
You return to Already connected with Cal.com selected. The right panel shows the connection and the + Add AI Agent button.
5Add an AI Agent
Click + Add AI Agent and select the agent that should use this Cal.com connection.
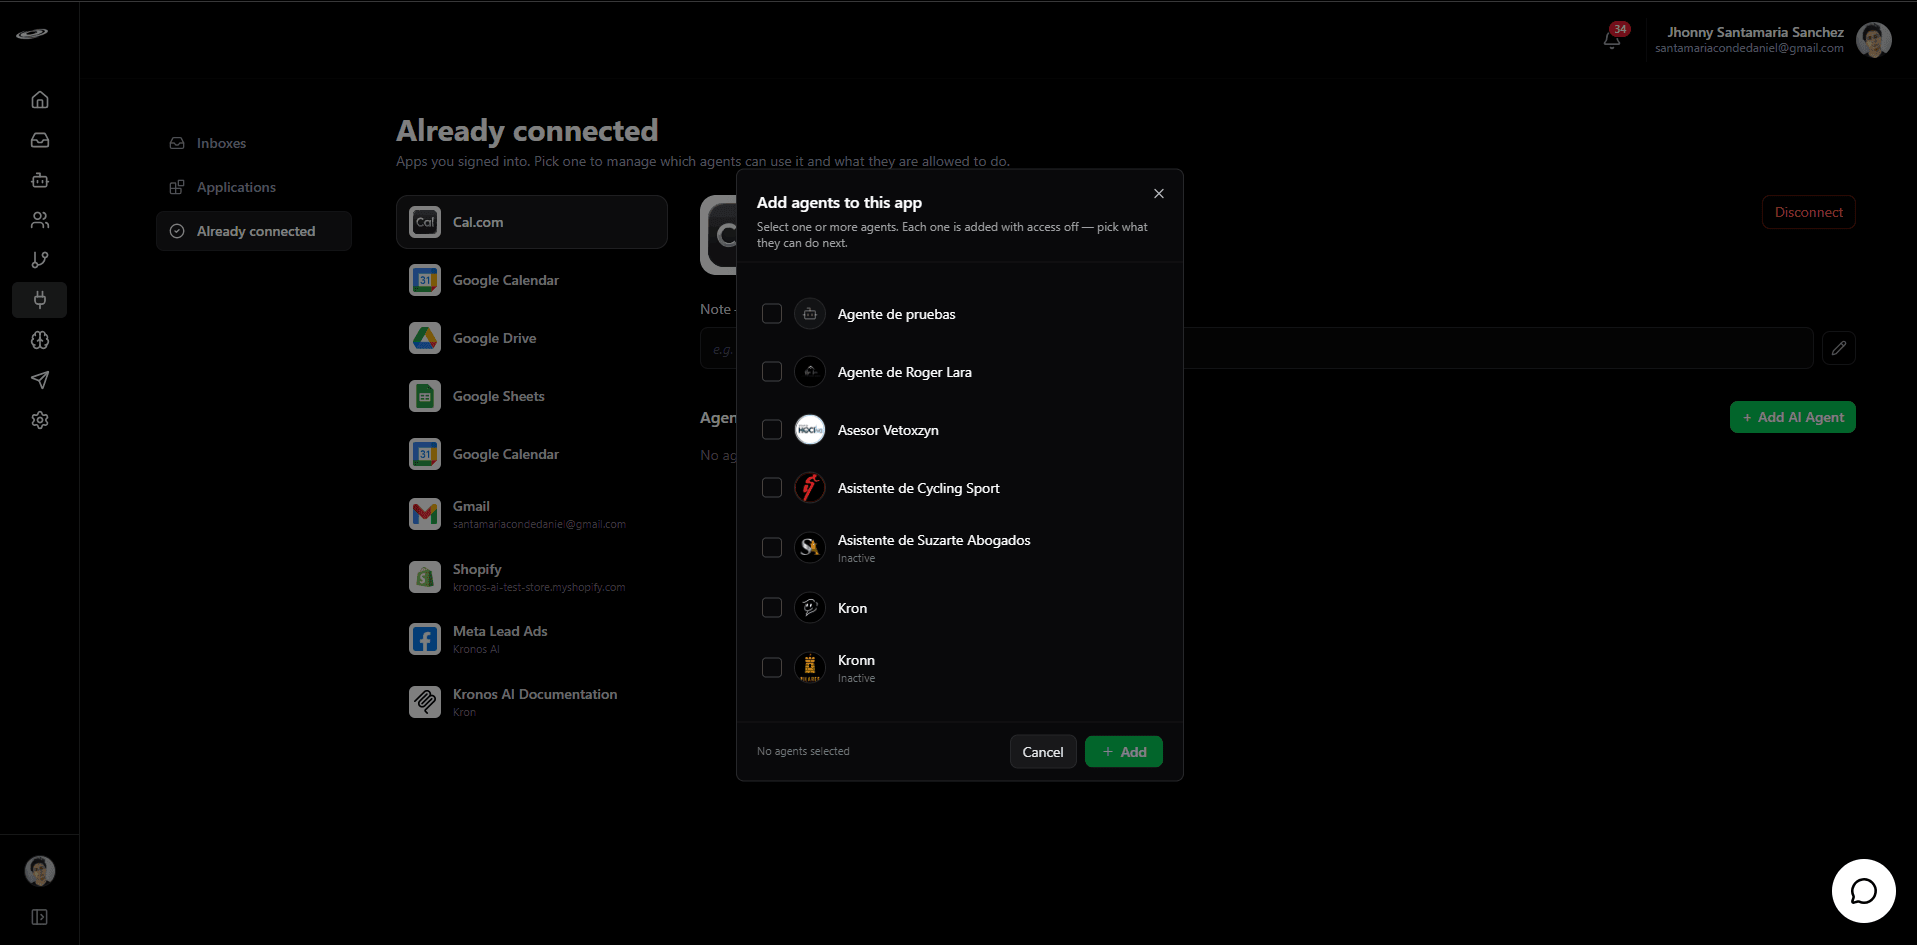
6Start with access Off
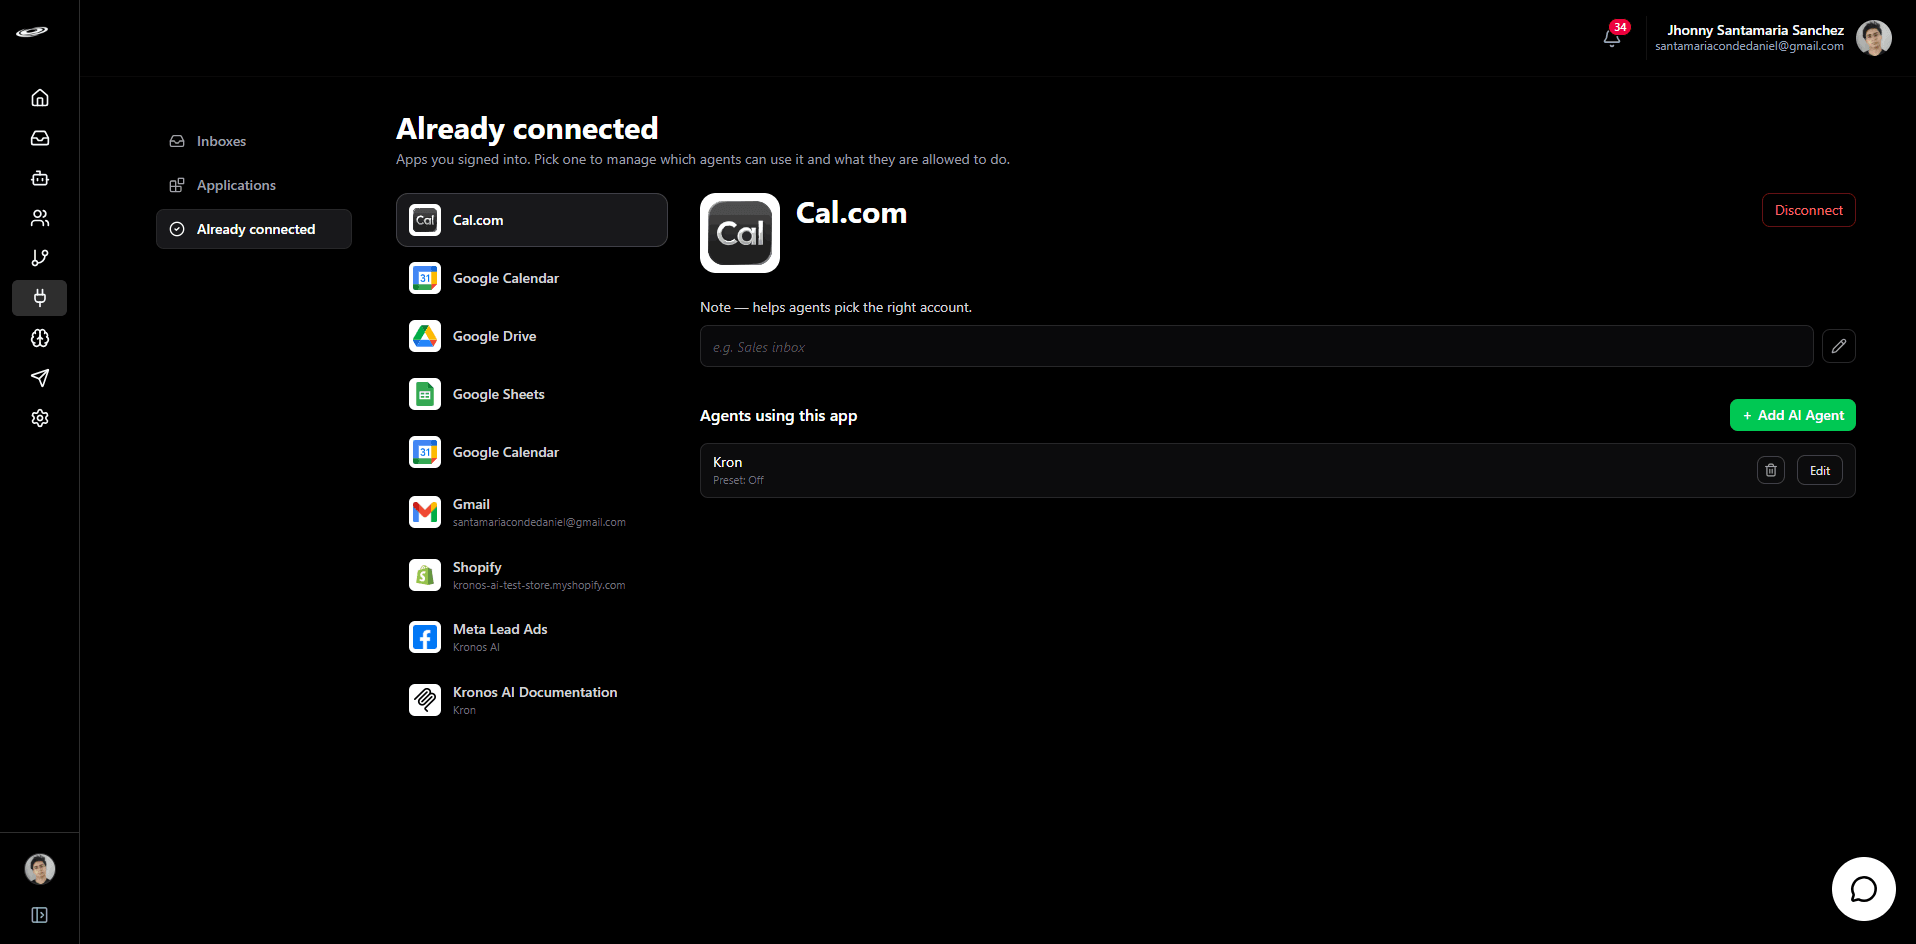
The new connection is added with access Off. Click Edit when you are ready to choose its access level.
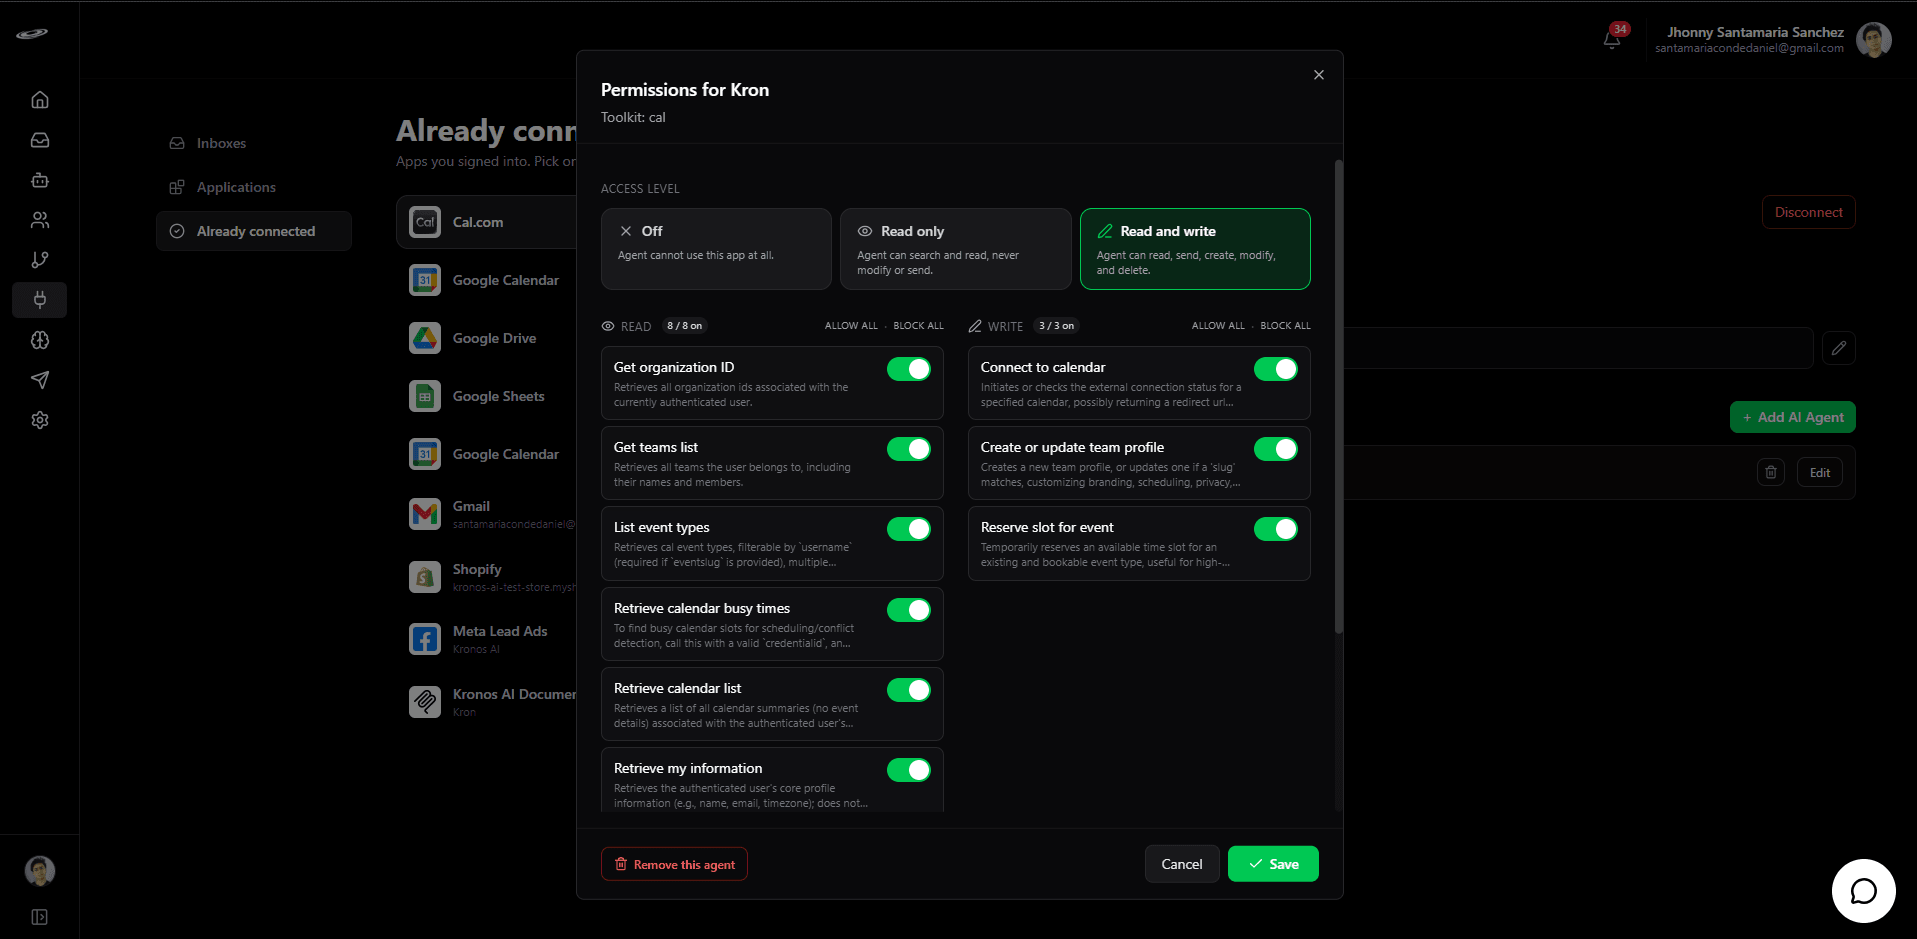
7Choose per-action permissions
Choose Off, Read only, or Read and write. The permissions dialog also lets you enable or disable individual read and write actions.
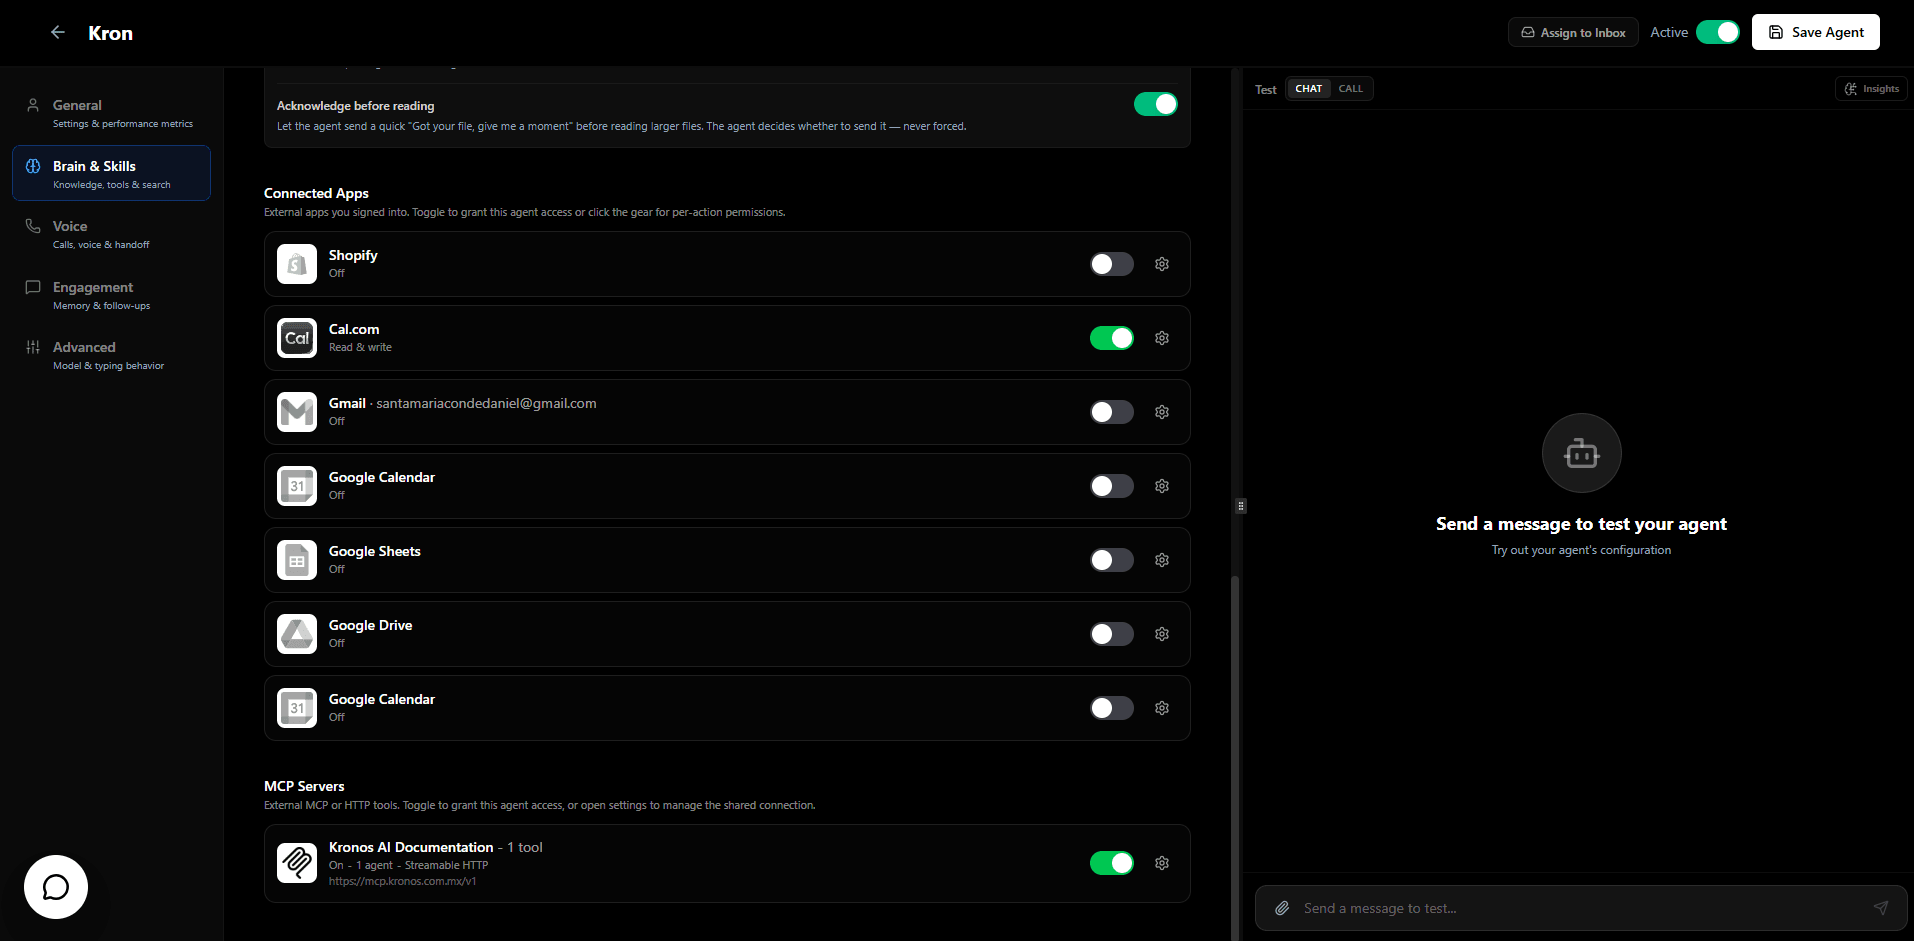
8Enable Cal.com in the agent editor
In the Connections tab, turn Cal.com on and choose the access level for the agent.
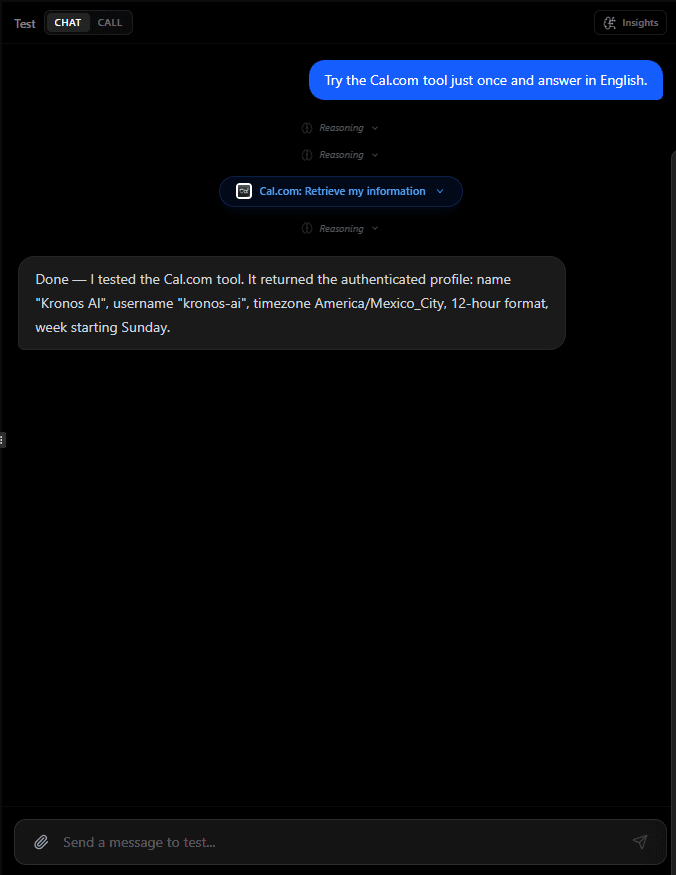
9Test the Cal.com action in Test Chat
Ask the agent to use Cal.com. The activity row shows the action and the reply includes the result returned for the connected account.
Giving an agent access
On the Cal.com management page, click + Add AI Agent and choose a preset:
- Off — the agent cannot use this Cal.com account.
- Read only — the agent can inspect scheduling information but cannot change calendars, team profiles, or reservations.
- Read and write — the agent can use all enabled Cal.com actions.
The same controls are available in the AI Agent editor under Connections.
Multiple Cal.com accounts on the same agent
You can connect more than one Cal.com account. Rename each connection with a clear note such as “Sales scheduling” or “Demo calendar”. If an agent can use more than one account and the request is ambiguous, it should ask which account to use.
When something goes wrong
- Needs reconnect — open Connect, select Cal.com, and complete the connection flow again.
- The agent cannot reserve a slot — check that its preset is Read and write and that the reservation action is enabled.
- The agent reached the action limit for this reply — send another message asking it to continue or split the request into smaller steps.
- The connected app is temporarily unavailable — retry shortly and check whether the connection shows a reconnect notice.
Privacy
Kronos AI stores connection metadata and the permissions you assign to each agent. Scheduling content stays in Cal.com and is retrieved only when an agent needs it for a task.
Disconnecting Cal.com removes the connection and the related agent permissions. See the Privacy page for more details.