

Shopify
Connect your Shopify store so your AI agents can answer order status questions, look up product details, check stock, manage discounts, and update inventory — only what you allow per agent.
Watch the walkthrough
A short video of the full connection, end to end. The written steps below cover the same flow.
What your agents can do with Shopify
Read actions
Available when an agent has Read only or higher.
- List and search orders, open a specific order by id.
- Look up a customer or their order history.
- List and inspect products, count products, list product images.
- List collections, products in a collection, count collections.
- Read the store profile (name, address, currency, plan).
Write actions
Available only with Read and write.
- Create a customer, an order, or a product.
- Update an order (fulfillment, notes, tags).
- Create or delete product images.
- Create or delete custom collections, add products to a collection.
- Delete a product.
Step 1 — Create your app at dev.shopify.com
You connect Shopify using your own app, created in Shopify's Dev Dashboard at dev.shopify.com. It takes a couple of minutes, stays under your control, and you can delete it any time.
Prefer to start from your store? In your Shopify admin go to Settings → Apps and sales channels → Develop apps → Develop apps in Dev Dashboard. (Shopify is retiring the older in-admin custom apps, so the Dev Dashboard is the path that keeps working.)
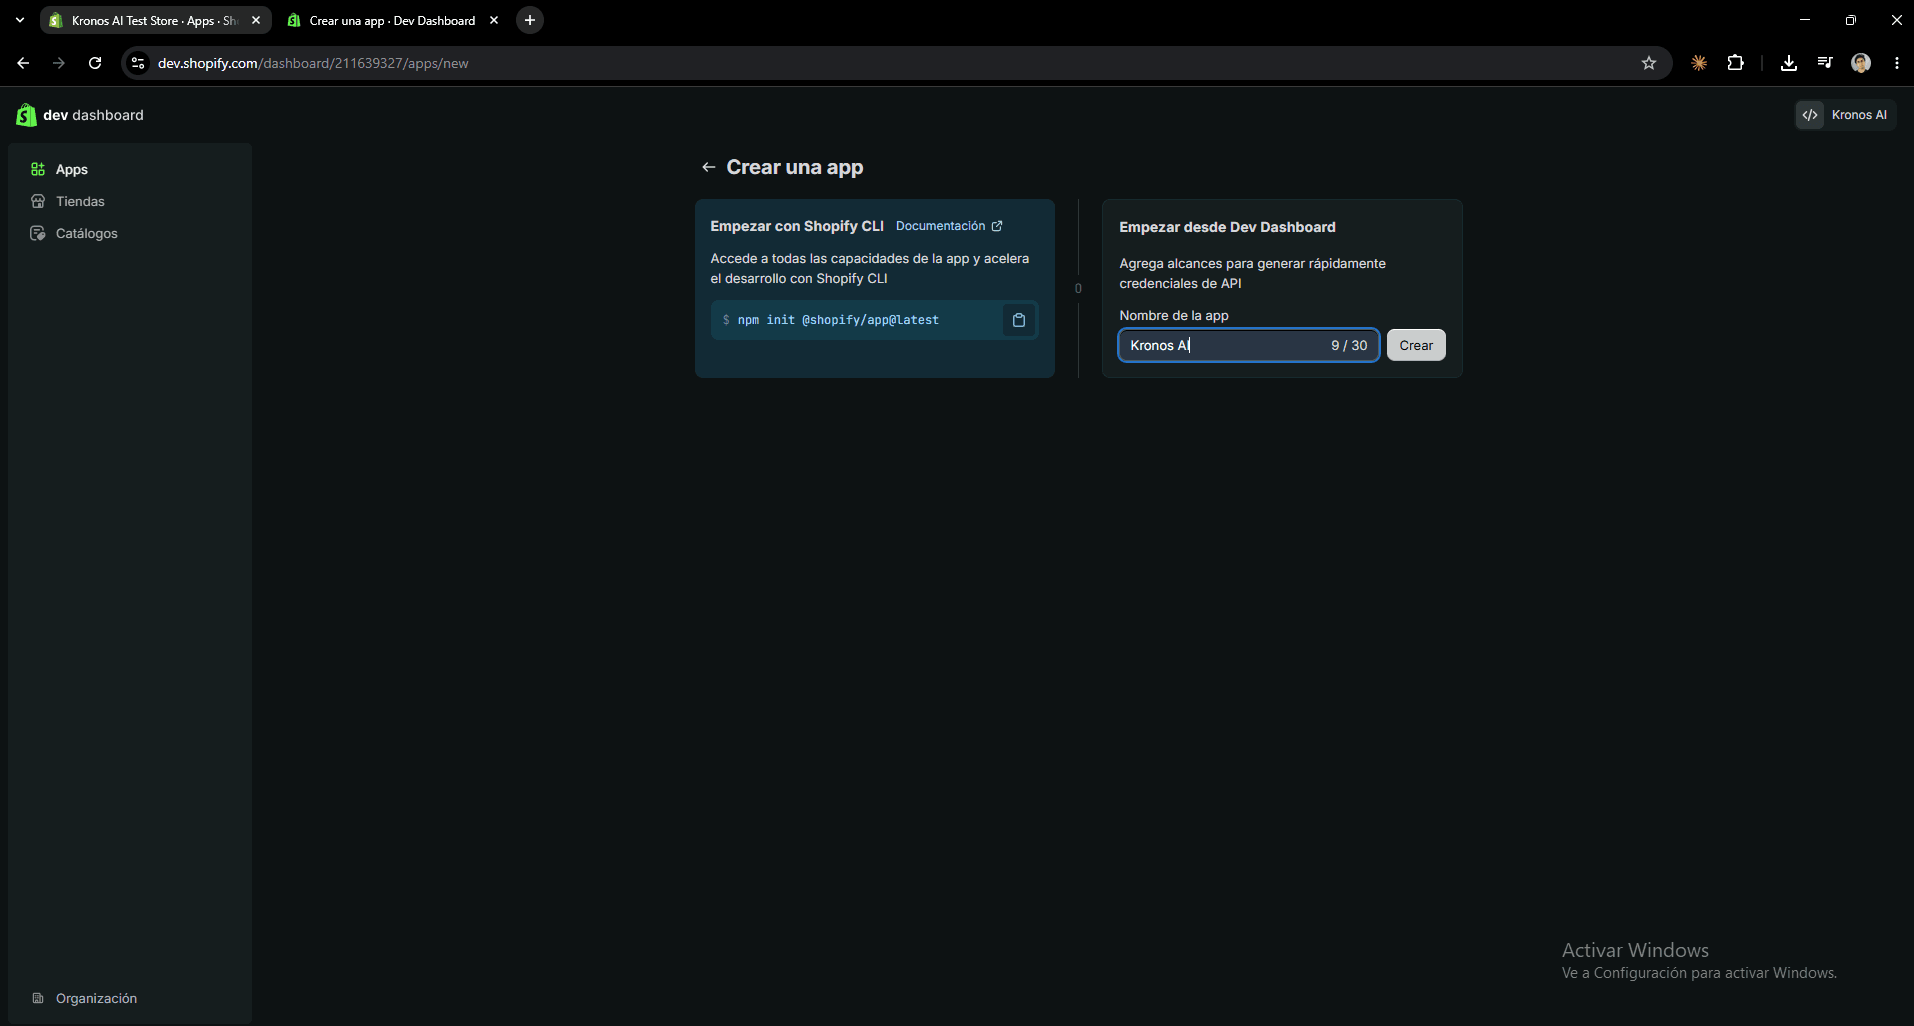
1Create an app
Open dev.shopify.com, go to Apps → Create app, type a name like “Kronos AI”, and click Create.
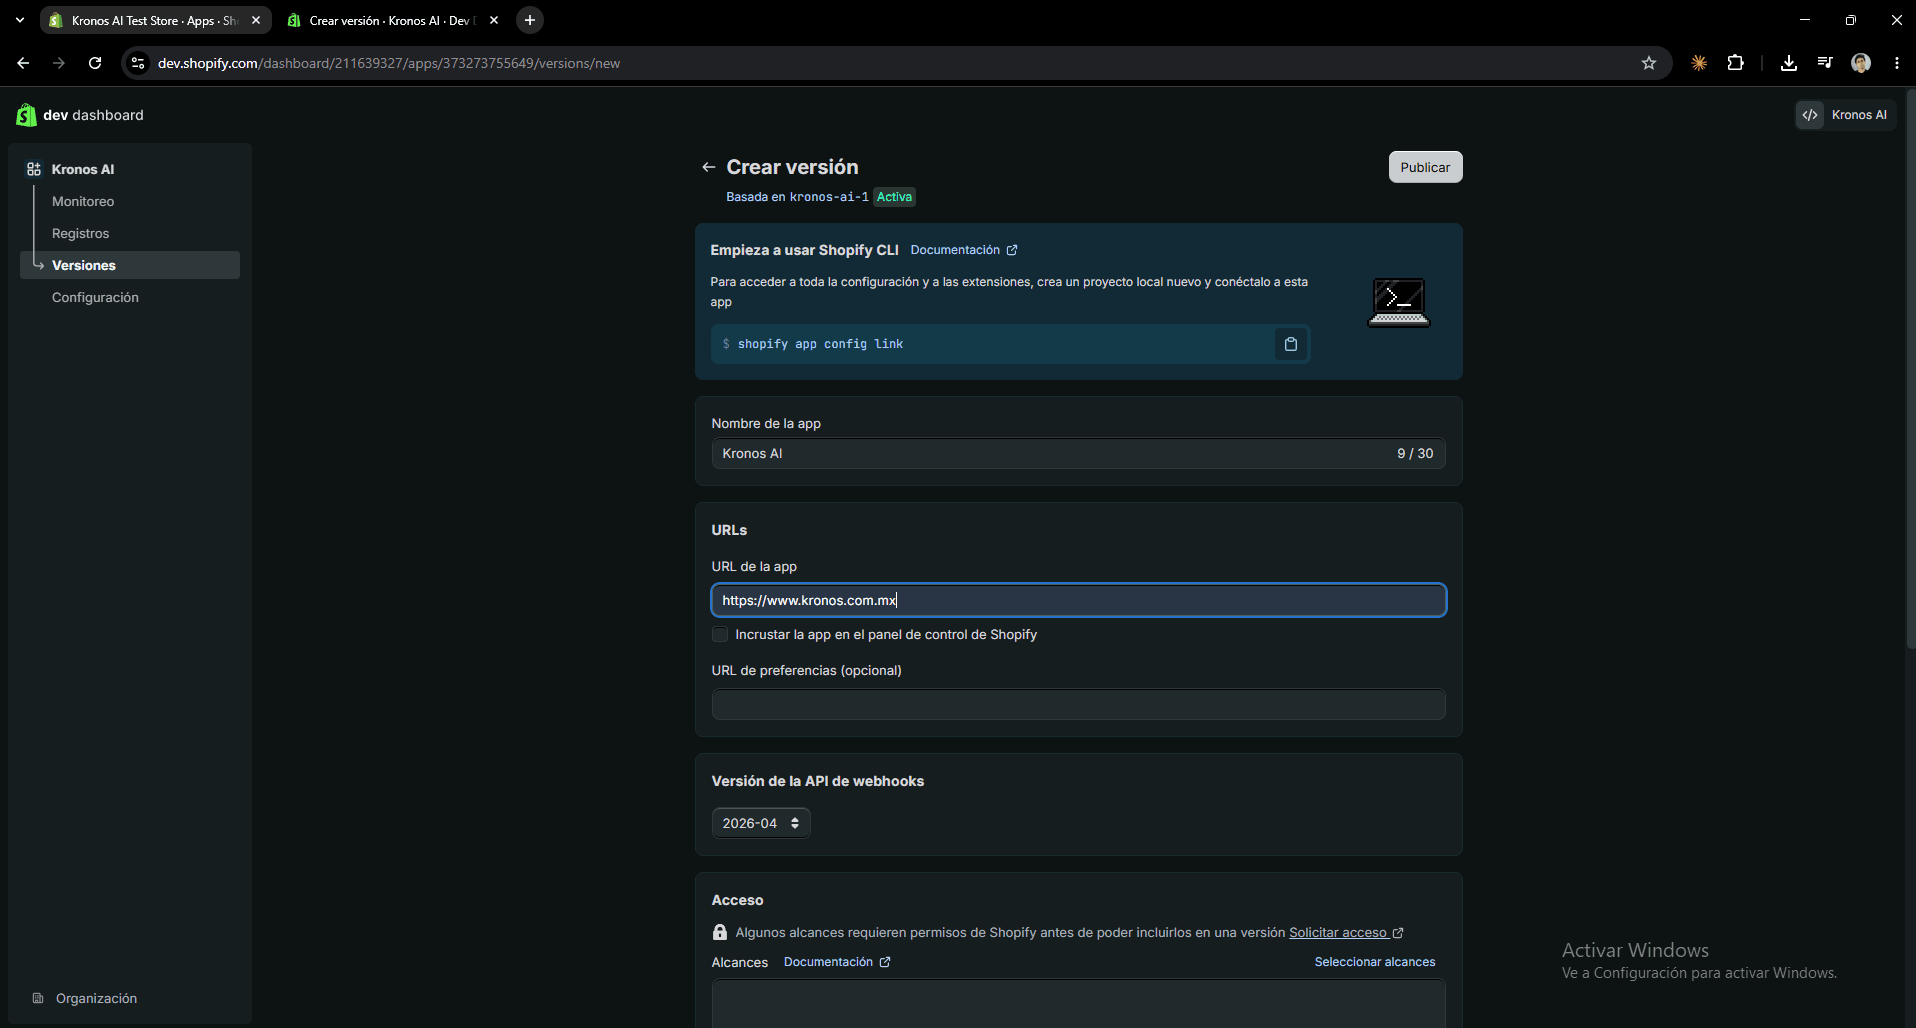
2Set the App URL and uncheck embedding
Create a version. In URLs, set the App URL (URL de la app) to https://www.kronos.com.mx and make sure “Embed app in Shopify admin” (Incrustar la app en el panel de control de Shopify) is UNCHECKED — Kronos AI uses the app for API access only, not as an embedded admin app.
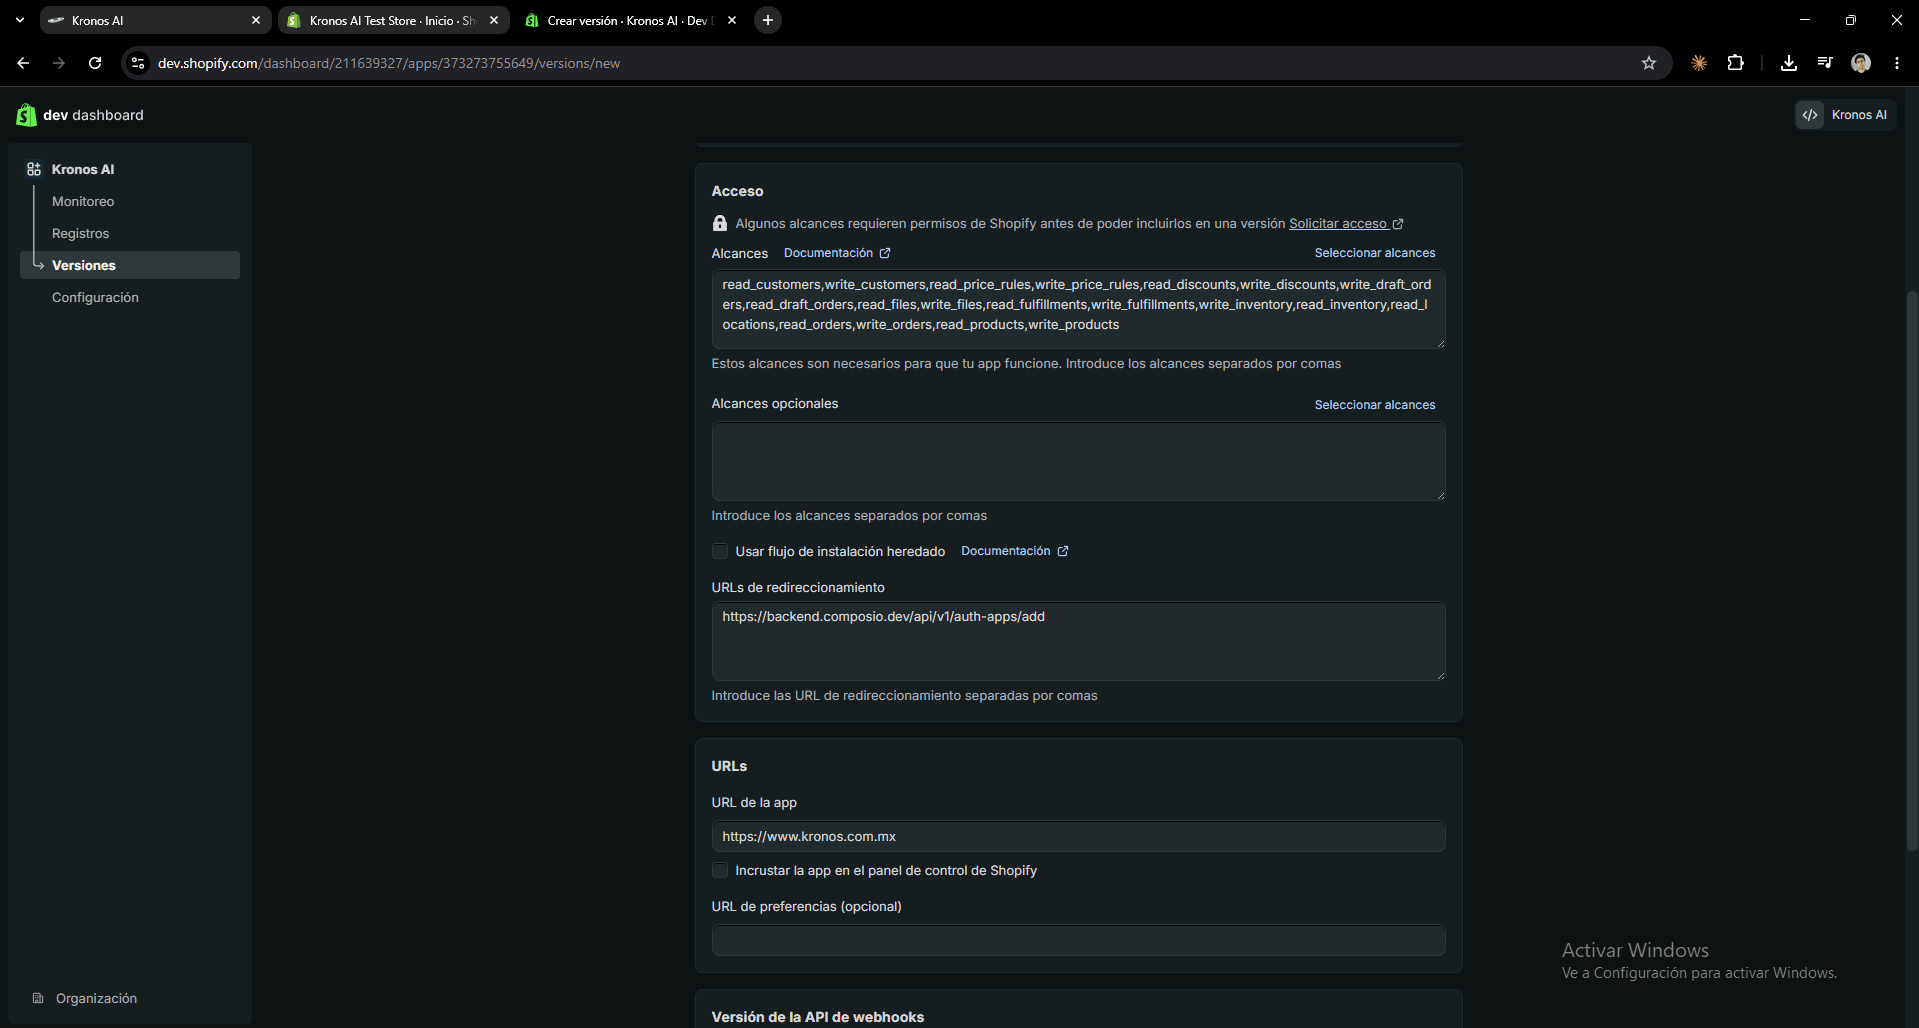
3Add the Scopes and the Redirect URL
On the version's Access section: in the Scopes field (Alcances) paste the full list below — click the box to copy it. Then in the Redirect URLs field (URLs de redireccionamiento) paste https://backend.composio.dev/api/v1/auth-apps/add. These scopes are the access the app may use; you still decide per-agent inside Kronos AI what each agent actually does.
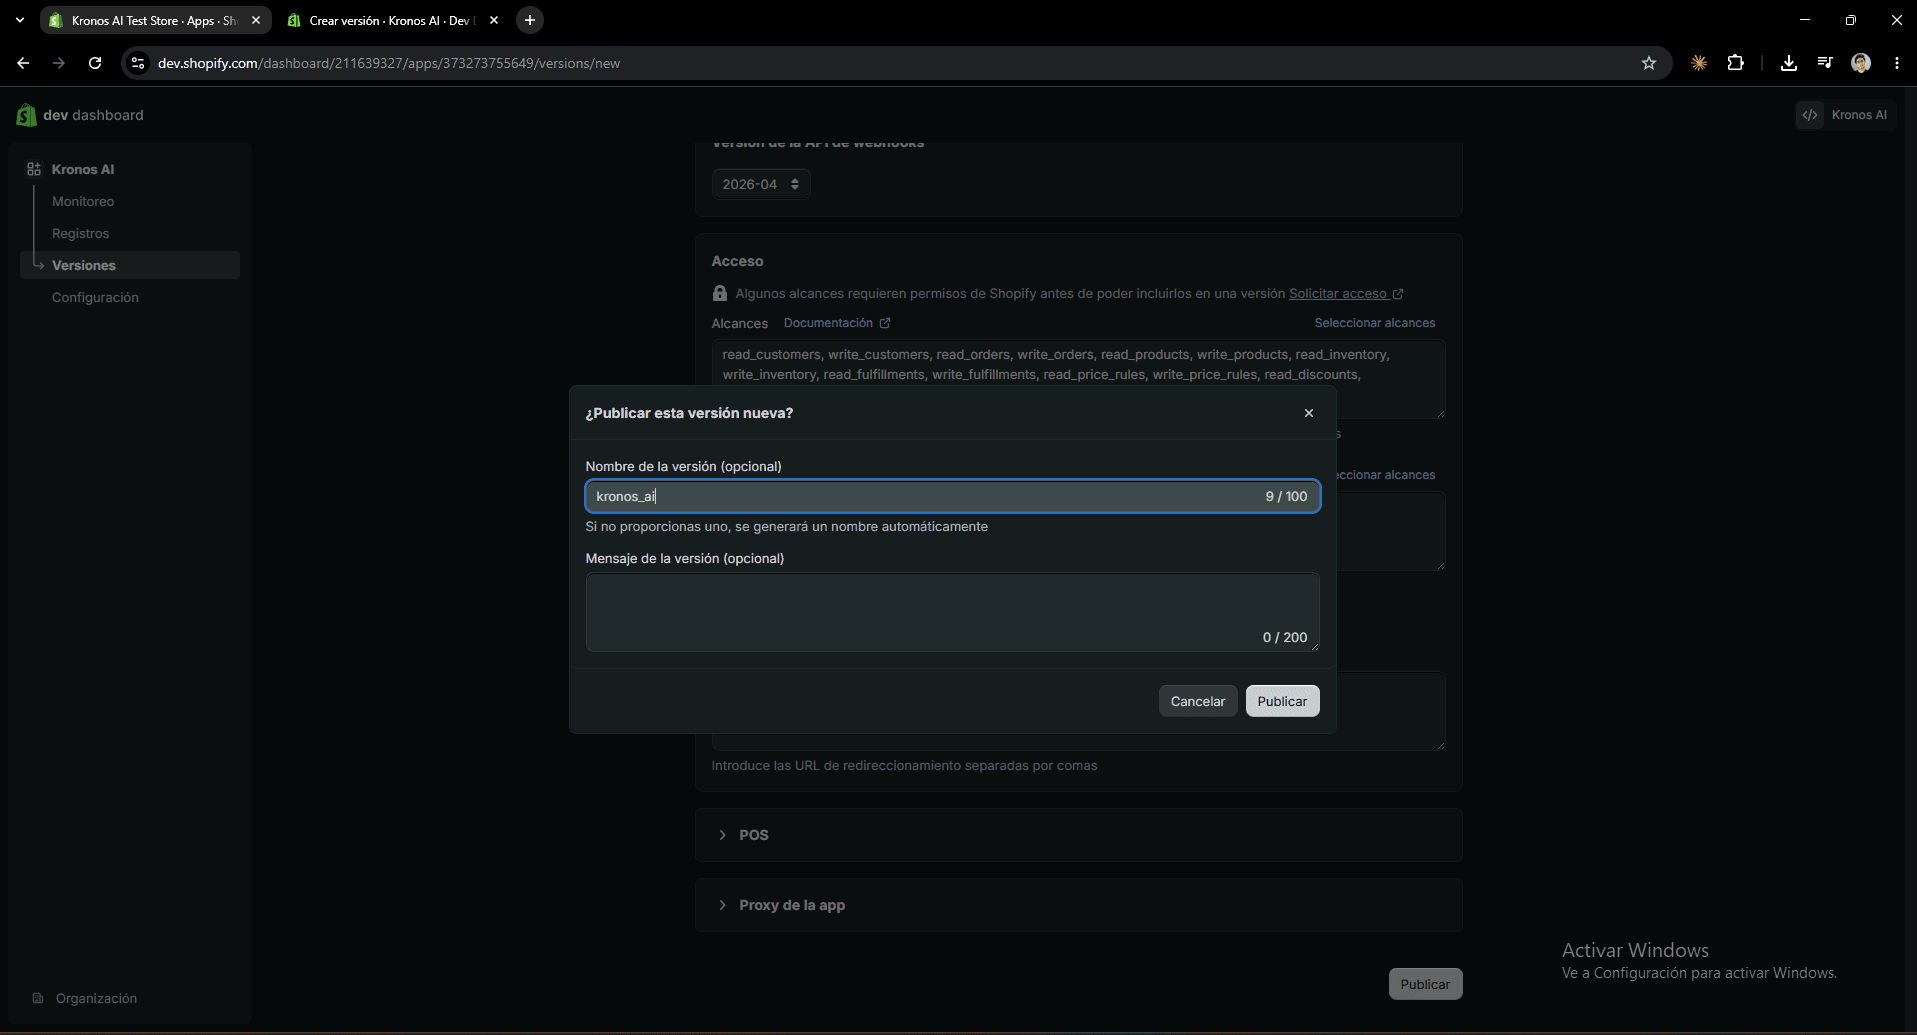
4Publish the version
Click Publish (top right), give the version a name if you like, and confirm. This makes the credentials live so the connection can use them.
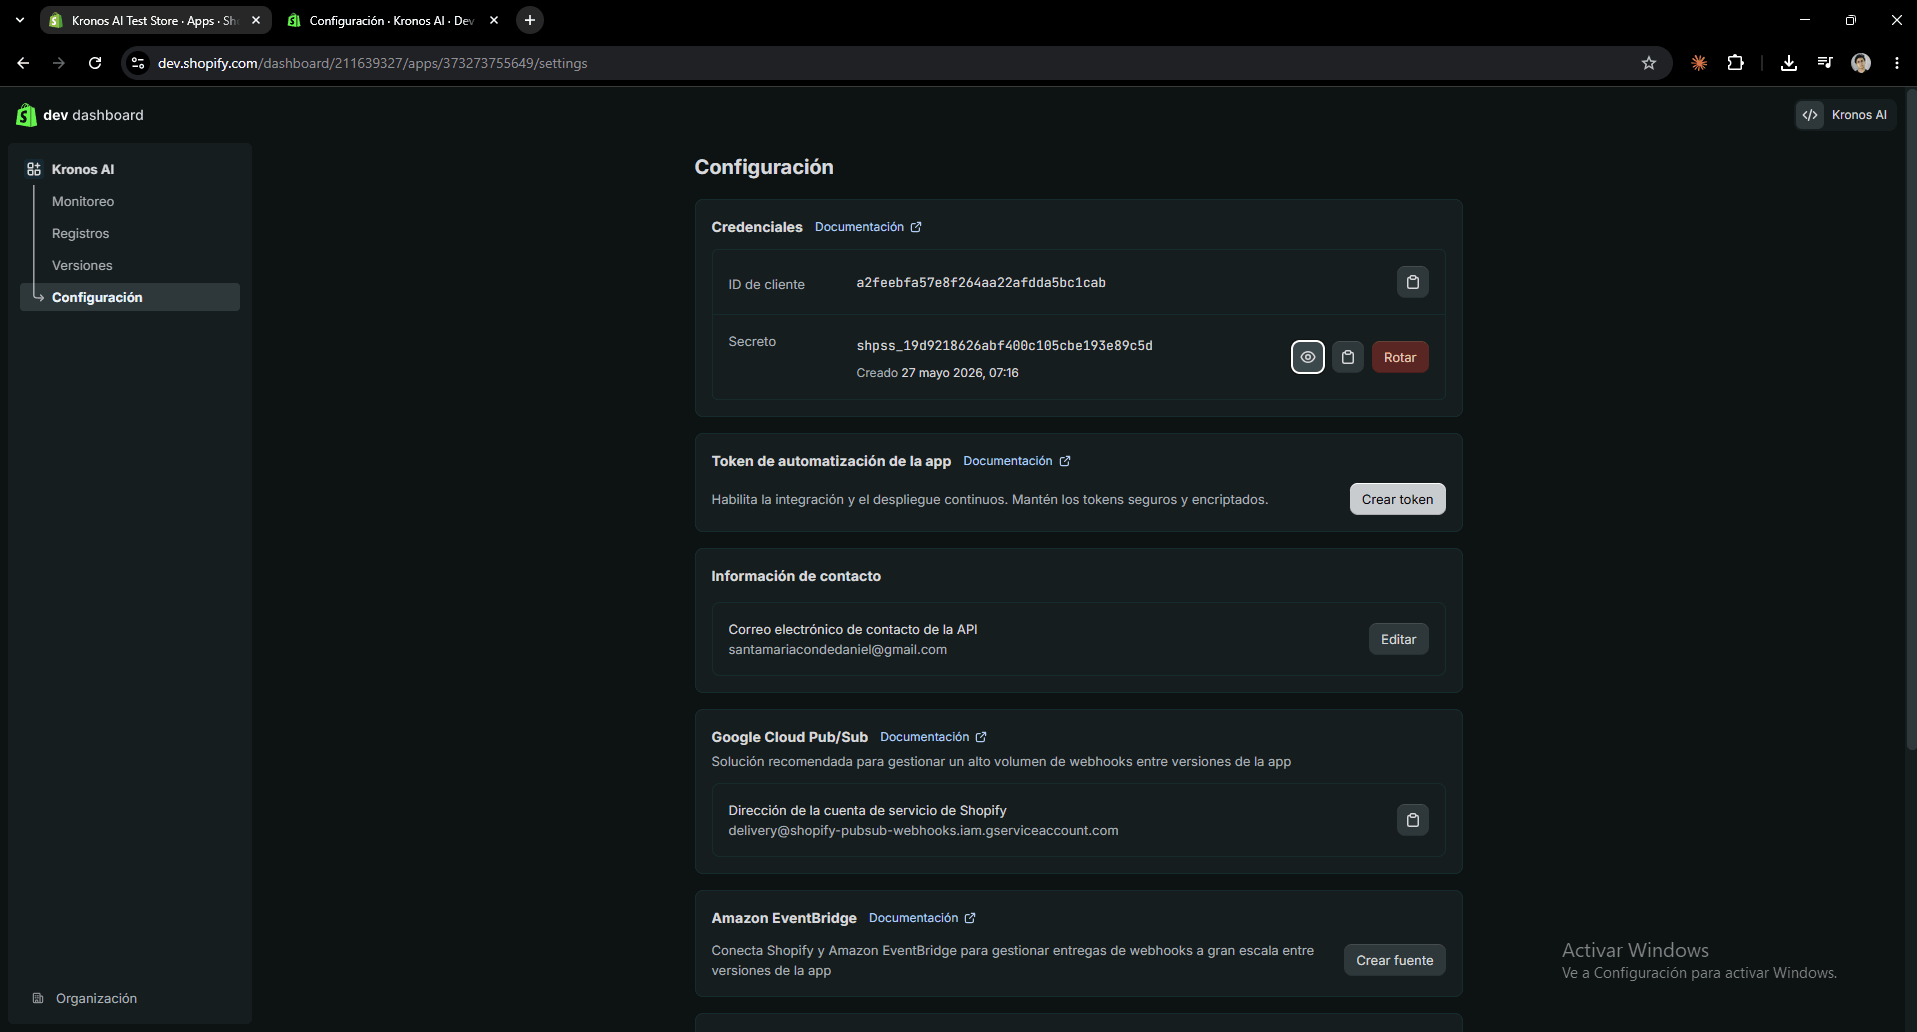
5Copy your Client ID and Secret
Go to Settings → Credentials (Configuración → Credenciales). Copy the Client ID (ID de cliente) with the copy icon. For the Secret (Secreto), click the eye icon to reveal it, then the copy icon. You will paste both into Kronos AI next.
Step 2 — Connect it to Kronos AI
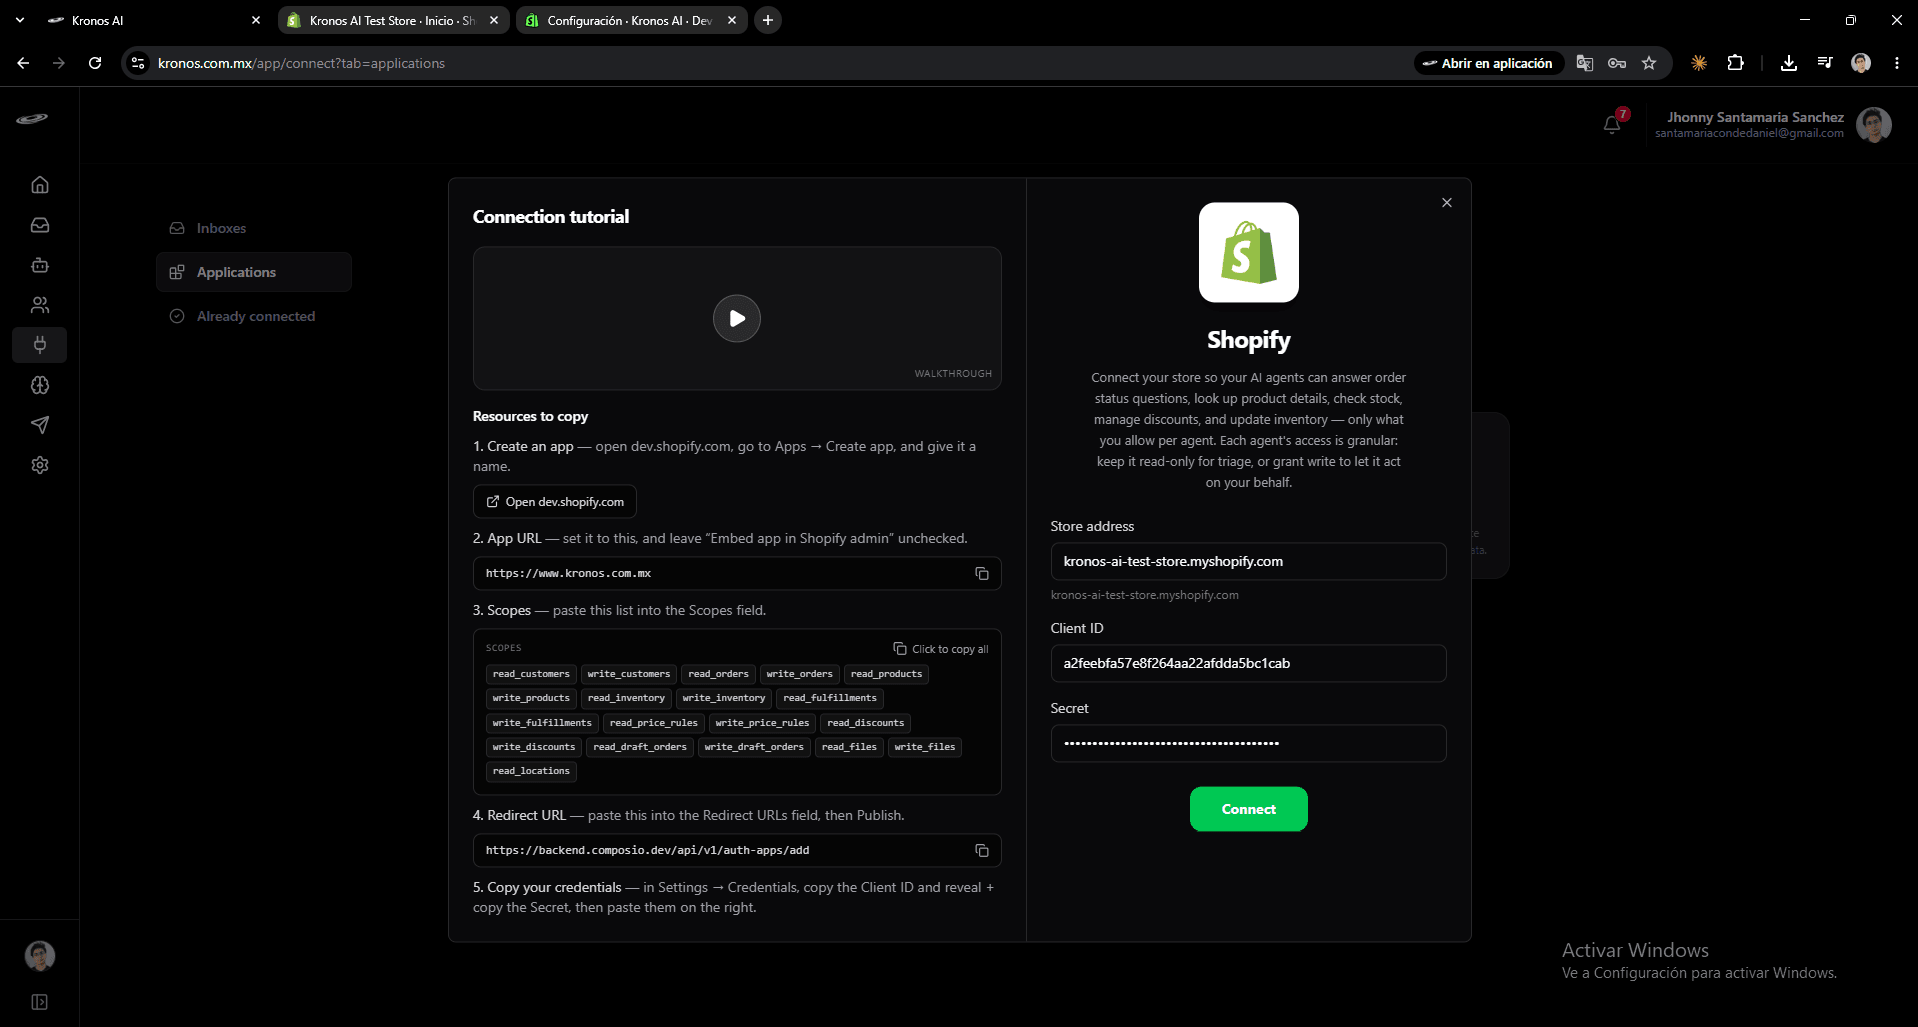
6Open Connect → Applications → Shopify
In Kronos AI, click Connect in the sidebar, open the Applications tab, and click the Shopify card. The dialog asks for three things: your Store address (the short subdomain, e.g. acme — Kronos AI adds .myshopify.com automatically and previews it), your Client ID, and your Secret. Paste all three and click Connect.
7Authorize the app in Shopify
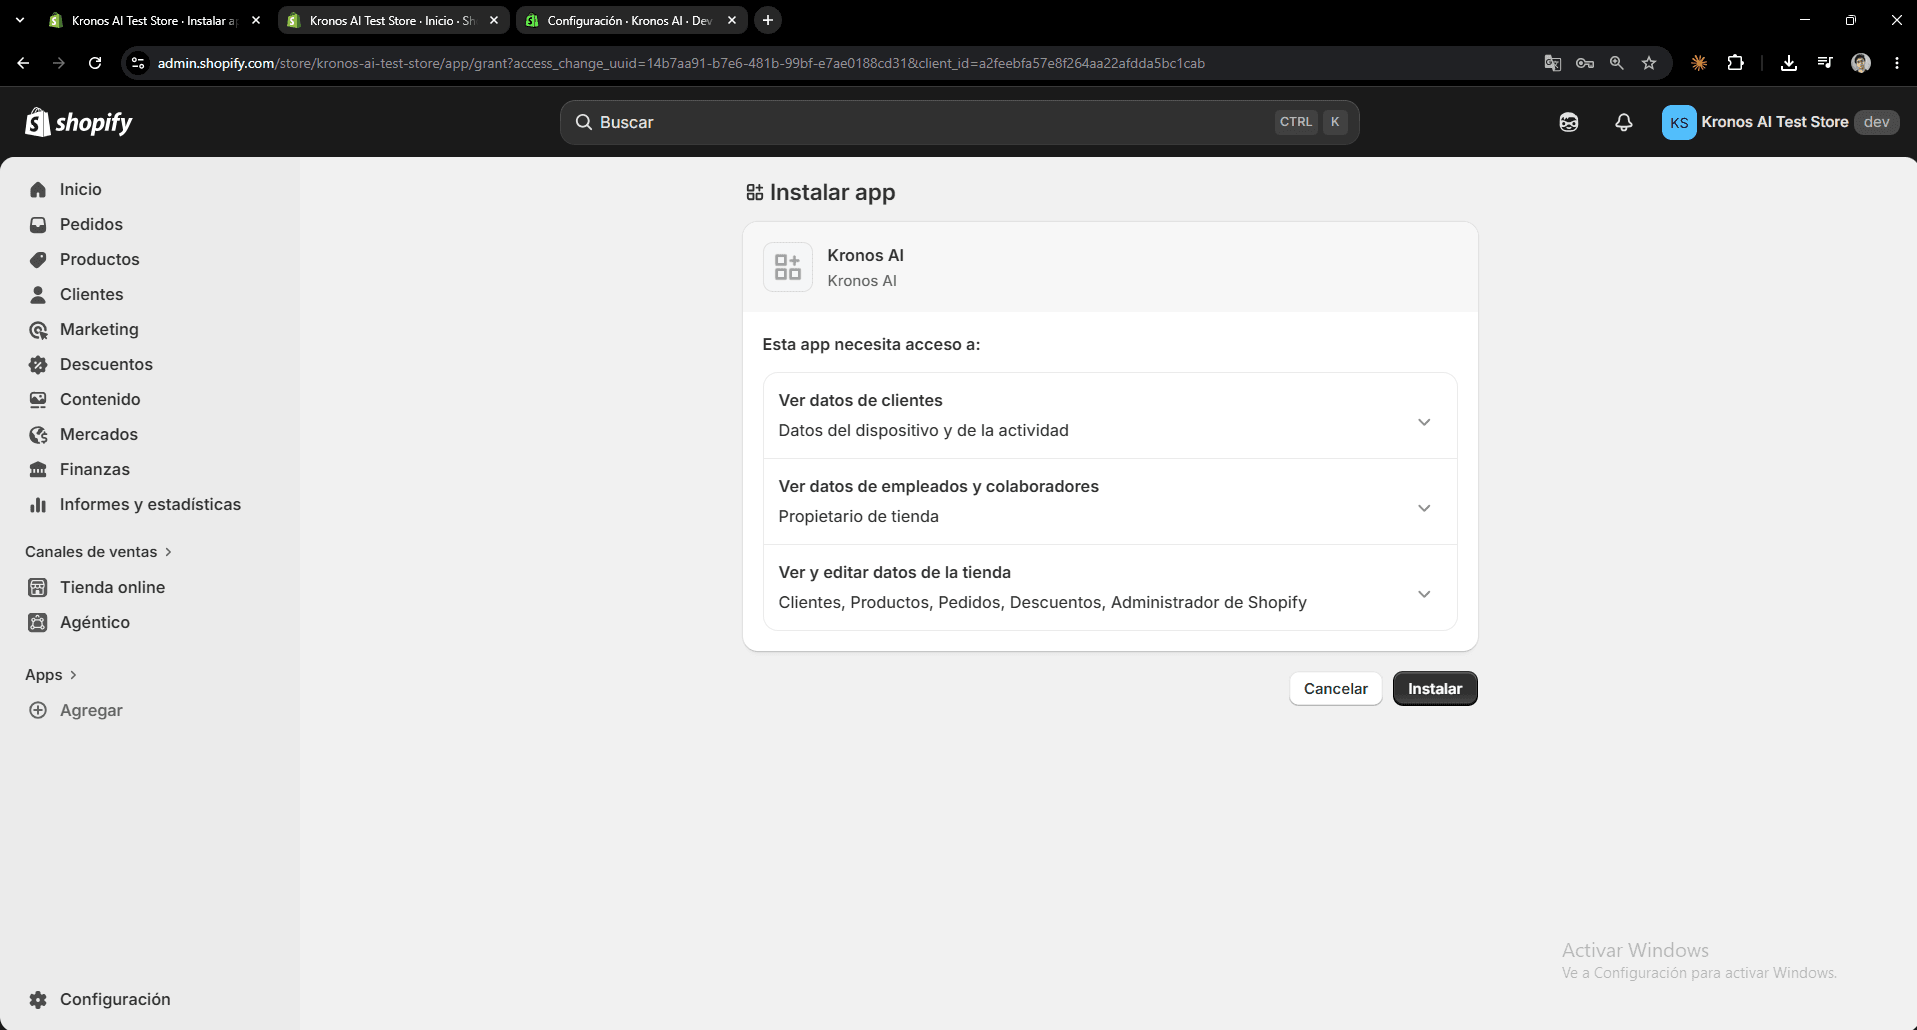
Shopify shows an Install app screen listing the access the app needs (customers, products, orders, discounts, store data). Review it and click Instalar (Install). Composio completes the connection and sends you back to Kronos AI.
8Add one or more agents to this store
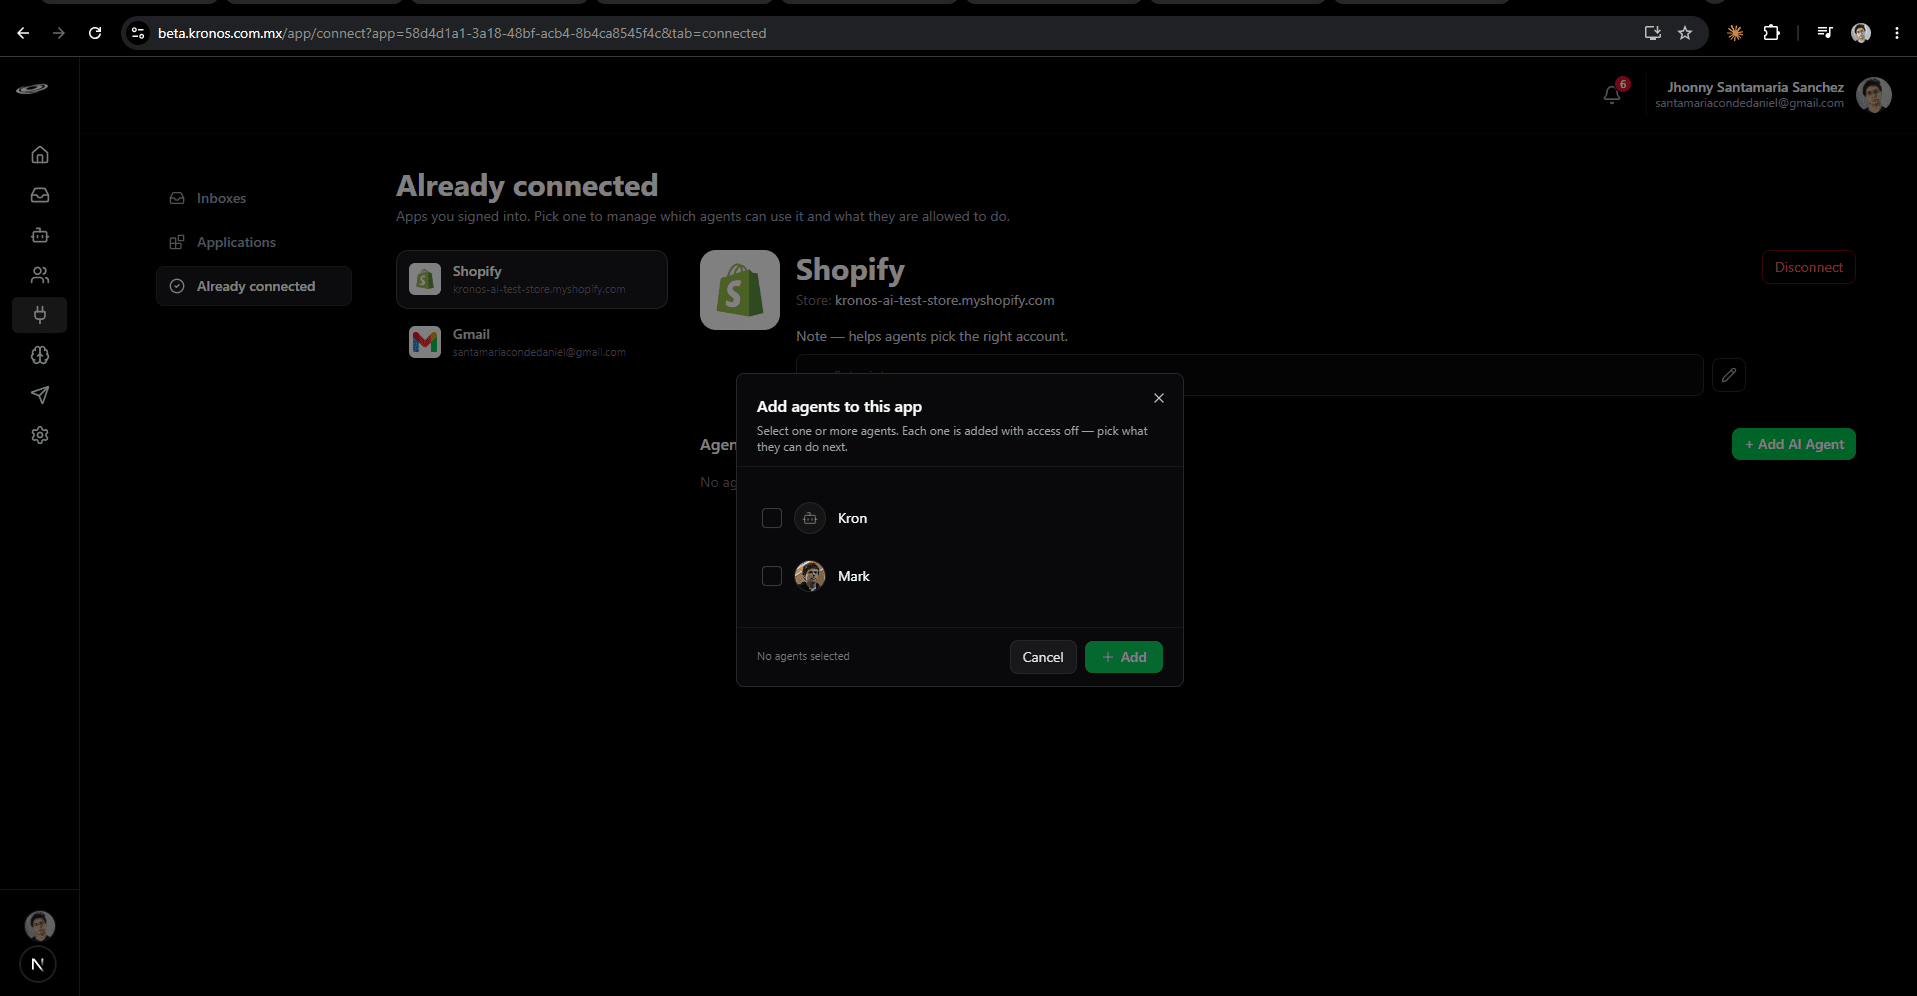
You land back on Connect → Already connected with the new Shopify entry pre-selected (its store address is the identifier, and there's a Note field to label it). Click + Add AI Agent — a popup lists every agent you own; pick one or several. Each is added with access Off by default, so the next step is where you decide what they can actually do.
9Set per-action permissions
Each agent appears in the Agents using this app list with its current preset (starts at Off). Use the trash icon to remove an agent from this store (the agent itself stays untouched), or Edit to open the permissions modal. There, pick the access level (Off, Read only, Read and write) and flip individual actions on or off to deviate from the preset — e.g. Read only plus Create an order ON gives an order-taking agent that cannot delete anything. Click Save when done.
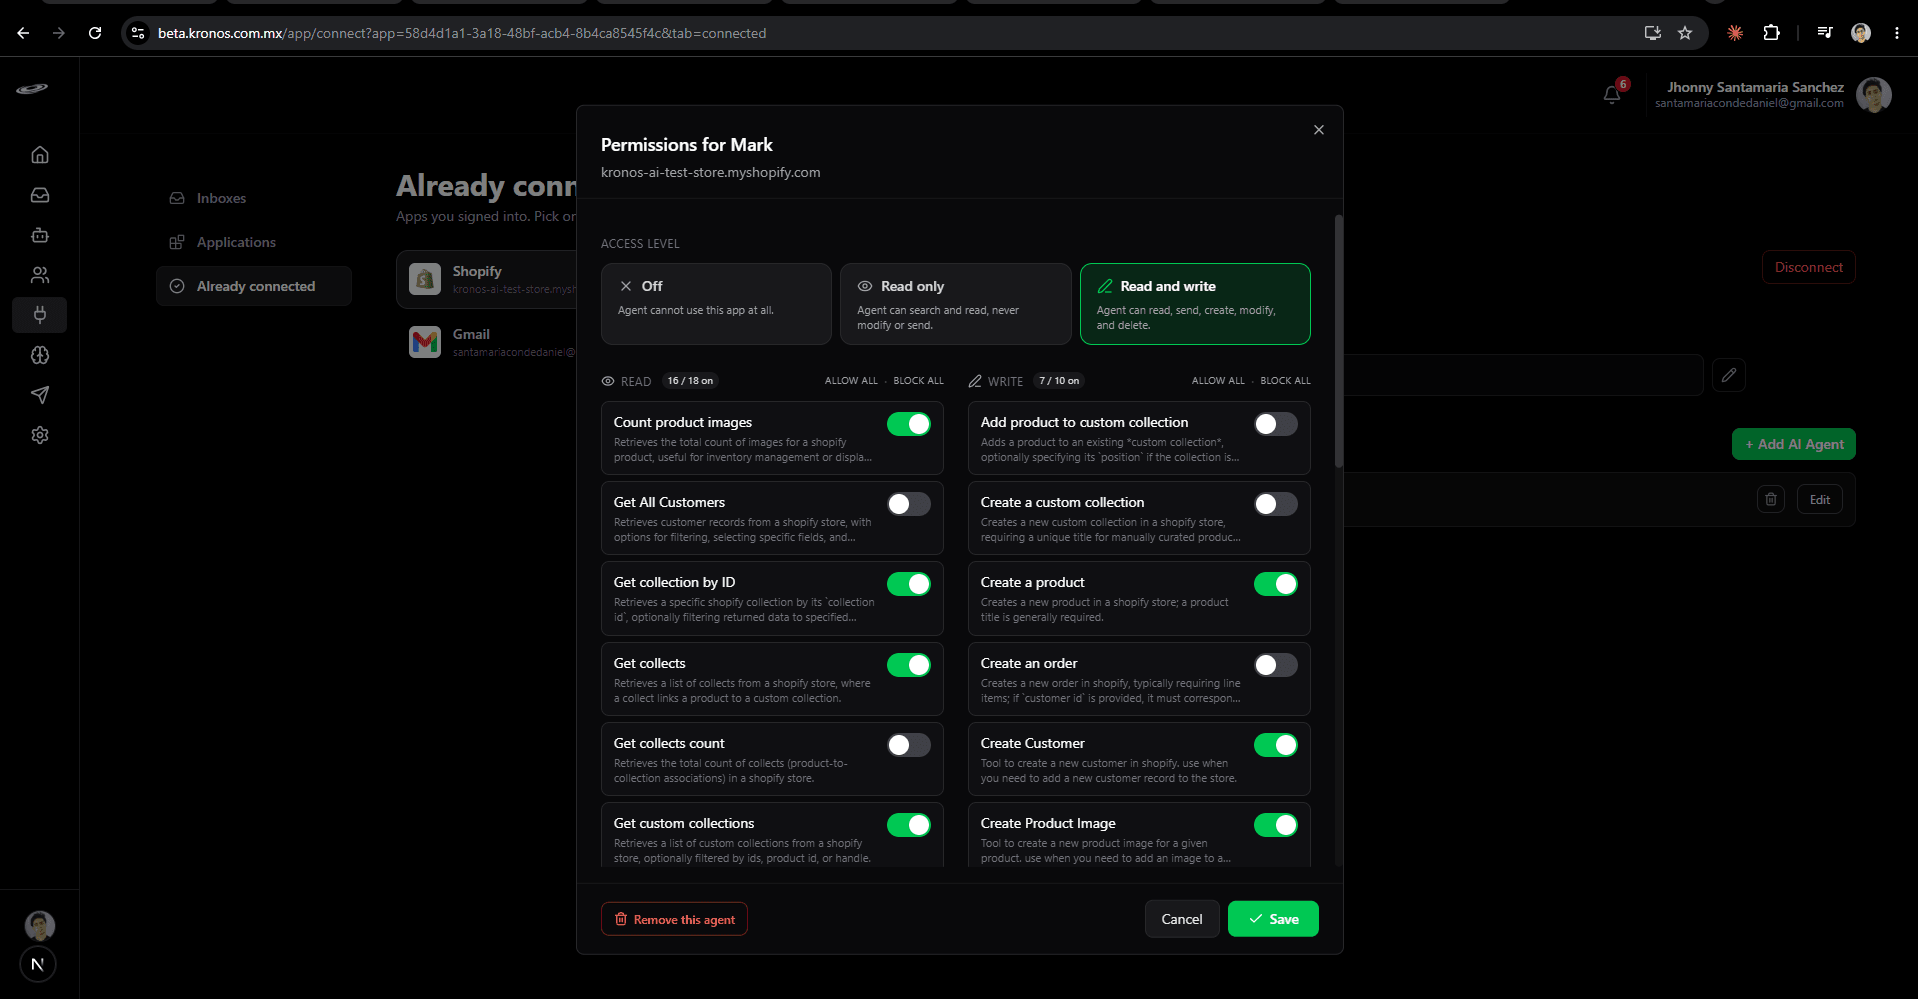
Access levels at a glance
The agent-assignment workflow is the same across every app — see Integrations for the full walkthrough.
- Off — the agent cannot touch this Shopify store.
- Read only — the agent can search and look up orders, products, customers, and collections, but cannot create, update, or delete anything.
- Read and write — the agent can do all of the above plus create, update, and delete orders, products, customers, and collections.
Inside the permissions modal you can override the preset action-by-action — for example, Read only EXCEPT "create an order" allowed for an order-taking agent that should not be able to modify inventory.
Multiple Shopify stores on the same account
You can connect more than one Shopify store (e.g. a B2C store and a wholesale store). Each appears as its own entry in the Already connected rail with its store address as the identifier. When an agent has access to two or more stores, the agent picks the right one from context — or asks the user if the request is ambiguous.
Cut ambiguity by either turning off the agent's access to one of the stores, or by adding a Note to each connection ("Retail store" vs "Wholesale store") so the agent has a human label to anchor on.
When something goes wrong
- "Needs reconnect" badge — Shopify revoked or expired the access (e.g. the custom app was uninstalled or its credentials were rotated in the Shopify admin). Open Connect → the Shopify entry and click Reconnect: Kronos AI takes you back to the Applications tab to connect again with your store address and API credentials (the API secret is never stored, so you re-enter it).
- Agent says "I can't create an order" — the agent's preset is Off or Read only without the matching write override. Open the permissions modal and adjust.
- Agent says the connected app is temporarily unavailable — Shopify or the connection had a transient hiccup. Ask the user to retry in a moment.
Privacy
Kronos AI does not store your Shopify catalog, orders, or customer records. Each time an agent uses a Shopify action it fetches just-in-time, uses what it needs to complete the task, and discards the result. The audit log records that the action happened (which agent, which action, when) but not the underlying order or customer details.
When you disconnect a Shopify store or cancel your Kronos AI subscription, the connection and all per-agent permissions are deleted immediately. See the Privacy and Data deletion pages for the legal and processor details.